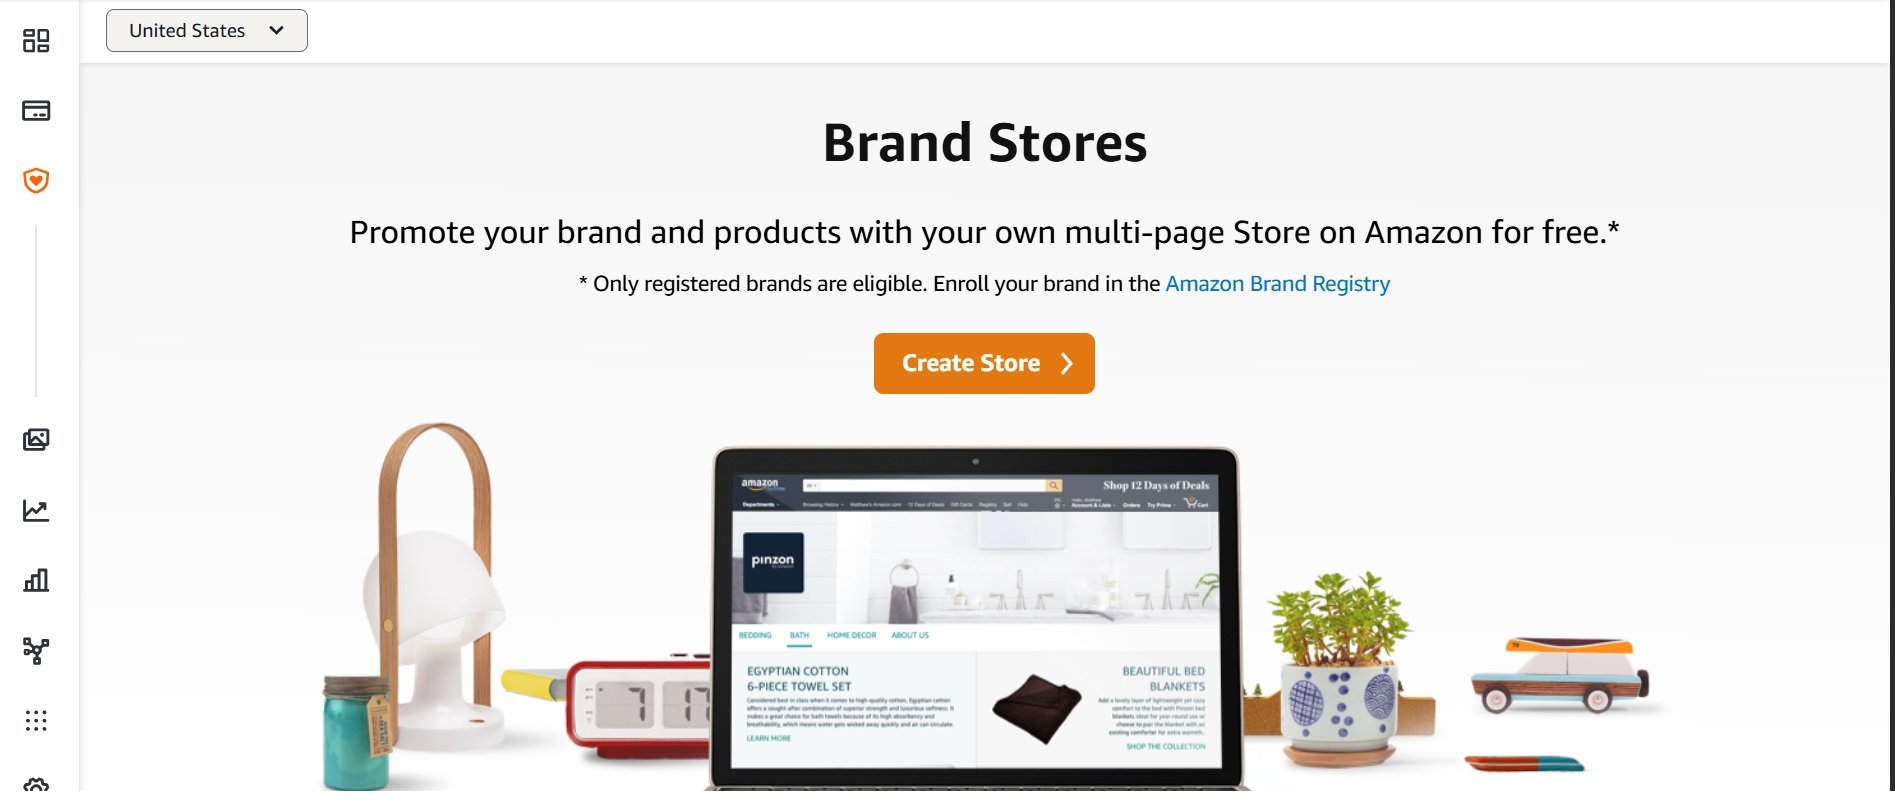
Amazon Store, is a free, multi-page branded shopping destination that lives directly on Amazon. It gives brand-registered sellers a dedicated space to display their full product catalog, communicate their brand story, and create a custom shopping experience without any competitor ads appearing on their pages.
Every Amazon Store gets its own unique URL in the format amazon.com/yourbrand. The Store supports up to three levels of page navigation and accepts a mix of product grids, lifestyle images, video content, shoppable image tiles, and more. For brand owners selling on Amazon, it functions as a mini-website inside the world’s largest marketplace.
When customers land on your product detail page, they can access your store directly through the store name displayed below the product title. This allows shoppers to easily explore your full range of products, view curated collections, and discover your best-selling items, boosting sales and increasing the average order value (AOV).
Unlike a standard product detail page where Amazon controls the layout and competitor ads surround your listing, your Store is fully yours. You decide the structure, the visuals, the product arrangement, and the story. That level of control is rare on Amazon, which is exactly why serious sellers treat their Store as a core part of their brand strategy.
Amazon Ads has published aggregate performance data across Stores on the platform, and the results make a strong case for investing real effort into your Store.
Below is a summary of the key performance data published by Amazon Ads for Stores on the platform.
| Performance Metric | Result | Source |
|---|---|---|
| Stores with 3+ pages vs. fewer pages | 83% higher shopper dwell time | Amazon Ads |
| Stores with 3+ pages vs. fewer pages | 32% higher attributed sales per visitor | Amazon Ads |
| Stores updated within the last 90 days | 21% more repeat visitors | Amazon Ads |
| Stores updated within the last 90 days | 35% higher attributed sales per visitor | Amazon Ads |
| Mobile share of Amazon shopping sessions | Approximately 70% of all browsing | Industry estimates |
| Amazon active customer accounts globally | 300+ million | Amazon annual reports |
Who Is Eligible to Create an Amazon Storefront?
Amazon does not open the Store builder to every seller. There are two firm requirements that you must meet before you can access it.
- Professional Seller Account: You must be subscribed to the Professional selling plan, which costs $39.99 per month. Individual seller accounts do not have access to the Store builder.
- Amazon Brand Registry Enrollment: Your brand must be enrolled in Amazon Brand Registry. This requires owning an active registered trademark (either a word mark or a design mark) issued by a recognized intellectual property office such as the USPTO, EUIPO, or UKIPO.
Vendors who sell to Amazon through Vendor Central (first-party sellers) also qualify for Amazon Stores through their Vendor Central dashboard.
What to Prepare Before You Start Building
Walking into the Store Builder without your assets ready leads to a fragmented, half-finished Store that sits in draft mode for weeks. Prepare everything listed below before you open the builder.
Here is a complete checklist of assets and decisions to have ready before you begin.
- Brand logo in high resolution (minimum 400 x 400 pixels, PNG or JPG format, transparent background preferred)
- Hero banner images sized at 3000 x 600 pixels for desktop display
- Lifestyle product images (minimum 1500 x 750 pixels depending on tile type)
- Product images already uploaded to your active ASINs in Seller Central
- A short brand story paragraph covering your origin, mission, or unique value
- A planned category structure for your subpages (how you want products organized)
- Video content if available (MP4 format, minimum 1280 x 720 resolution, under 5 minutes, maximum 500 MB file size)
How to Create an Amazon Storefront: Step-by-Step Process
Step 1: Enroll in Amazon Brand Registry
If your brand is not yet enrolled, this is the first step. Visit brandregistry.amazon.com and start your application.
Amazon will ask you for the following during enrollment.
- Your registered trademark number
- The intellectual property office that issued your trademark
- A list of product categories where your brand manufactures or sells
- Images showing your branding on products and packaging
Approval timelines vary, but most applications are processed within 2 to 10 business days. Once approved, you unlock access to Amazon Stores, A+ Content, Sponsored Brands ads, Brand Analytics, and other brand owner tools.
If your trademark is still pending, Amazon’s IP Accelerator program may allow early enrollment by connecting you with vetted IP law firms.
Step 2: Access the Store Builder in Seller Central
Log into your Seller Central account. In the main navigation menu, go to Stores and then select Manage Stores. Click Create Store and choose your registered brand from the dropdown menu.
If your brand does not appear in the dropdown, verify that your Brand Registry enrollment is active and connected to the same Seller Central account you are logged into. This is the most common reason sellers cannot find the Store builder option.
Step 3: Set Your Brand Display Name and Upload Your Logo
Amazon prompts you to enter two things at this stage.
- Brand Display Name: This appears at the top of your Store and in the navigation bar. Use your actual brand name, not a tagline or slogan.
- Brand Logo: Upload a clean, high-resolution version of your logo. Minimum dimensions are 400 x 400 pixels. Choose a version that is legible on both desktop monitors and small mobile screens.

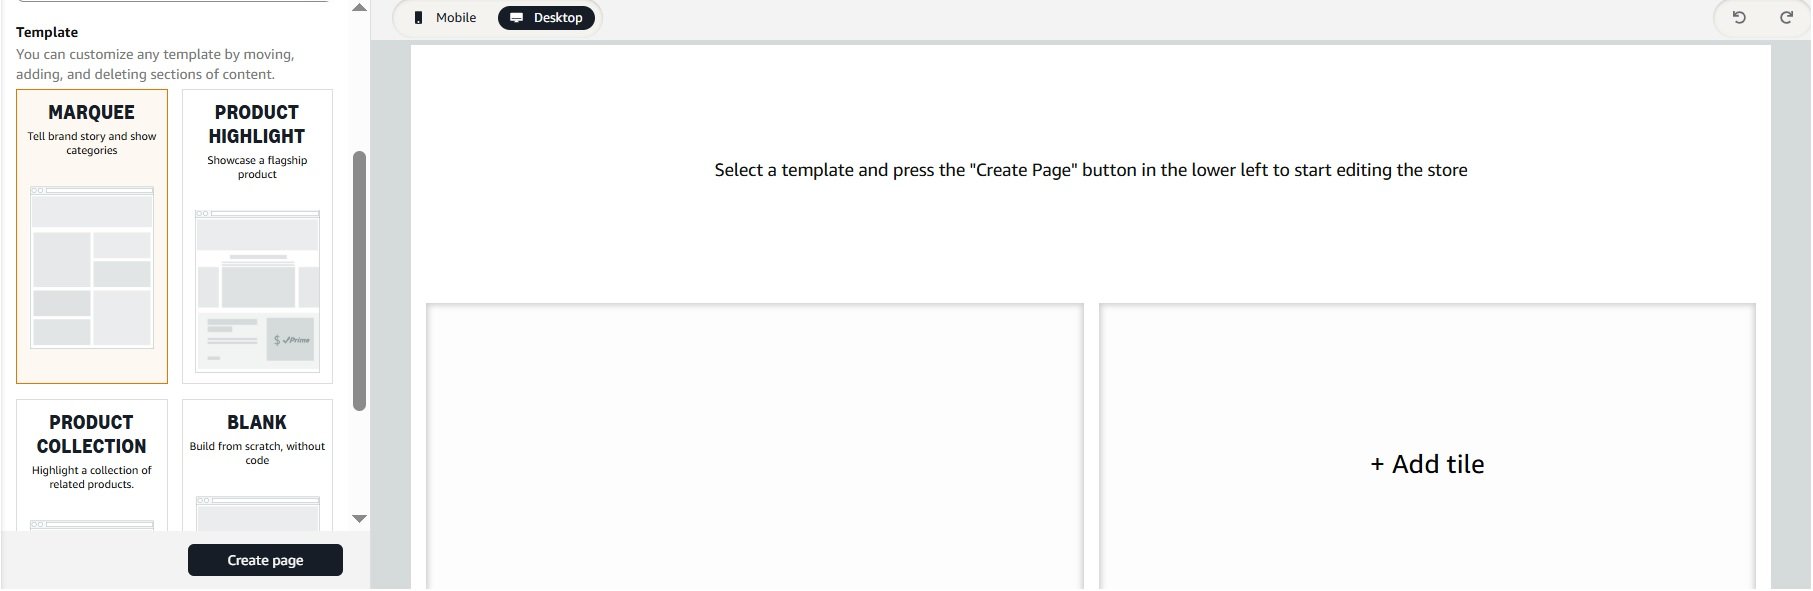
Step 4: Select a Page Template
Amazon offers three primary templates to start building your homepage. Each template provides a different default layout, but all of them can be fully customized after selection using the drag-and-drop editor.
Below is a comparison of the three template options and the scenarios where each works best.
| Template Name | Default Layout | Best Suited For |
|---|---|---|
| Marquee | Large hero image at top, followed by curated product sections and text blocks | Brands with strong lifestyle photography and a compelling brand story |
| Product Highlight | Focused layout that showcases individual products with detailed descriptions | Brands that want to spotlight specific hero products or new launches |
| Product Grid | Clean, catalog-style grid displaying many products with minimal surrounding content | Brands with large catalogs that want maximum product visibility immediately |
For most sellers, the Marquee template is the strongest starting point for the homepage. It balances visual storytelling with product discoverability. Product Grid works well for subpages where shoppers are browsing within a specific category.
You can change templates or override the default layout at any time using the tile editor.
Step 5: Build Out Your Homepage
Your homepage receives the most traffic of any page in your Store. Every element on it should serve one of three purposes: establish your brand identity, guide shoppers toward the right products, or encourage deeper browsing.
![]()
Here are the essential elements to include on your homepage.
- A hero banner image or background video that immediately communicates your brand and product category
- A navigation bar with clear, descriptive labels for each product category
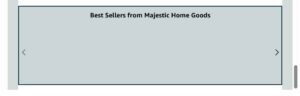
- A best-sellers or featured products section near the top of the page
- A brief brand story block with supporting imagery (keep it to 2 to 3 sentences)
- At least one call-to-action tile or shoppable image that leads to a specific subpage
Resist the urge to fill the homepage with long paragraphs of text. Shoppers on Amazon are browsing, not reading essays. Let strong visuals and well-organized product tiles do the communication.
Step 6: Create Your Subpages
Subpages let you organize your product catalog into logical categories, collections, or use cases. Amazon allows up to three levels of page hierarchy beneath your homepage.
A practical page structure might look like this.
- Level 1 (visible in main nav): Skincare, Haircare, Body Care
- Level 2 (under Skincare): Cleansers, Moisturizers, Serums
- Level 3 (under Moisturizers): Day Creams, Night Creams, SPF Moisturizers
Build at least three subpages. Amazon’s own published data confirms that Stores with three or more pages achieve 83% more dwell time and 32% higher sales per visitor compared to single-page Stores.
When naming your subpages, use descriptive product category terms instead of creative marketing phrases. “Running Shoes” outperforms “Move Your Way” for both navigation clarity and search discoverability.

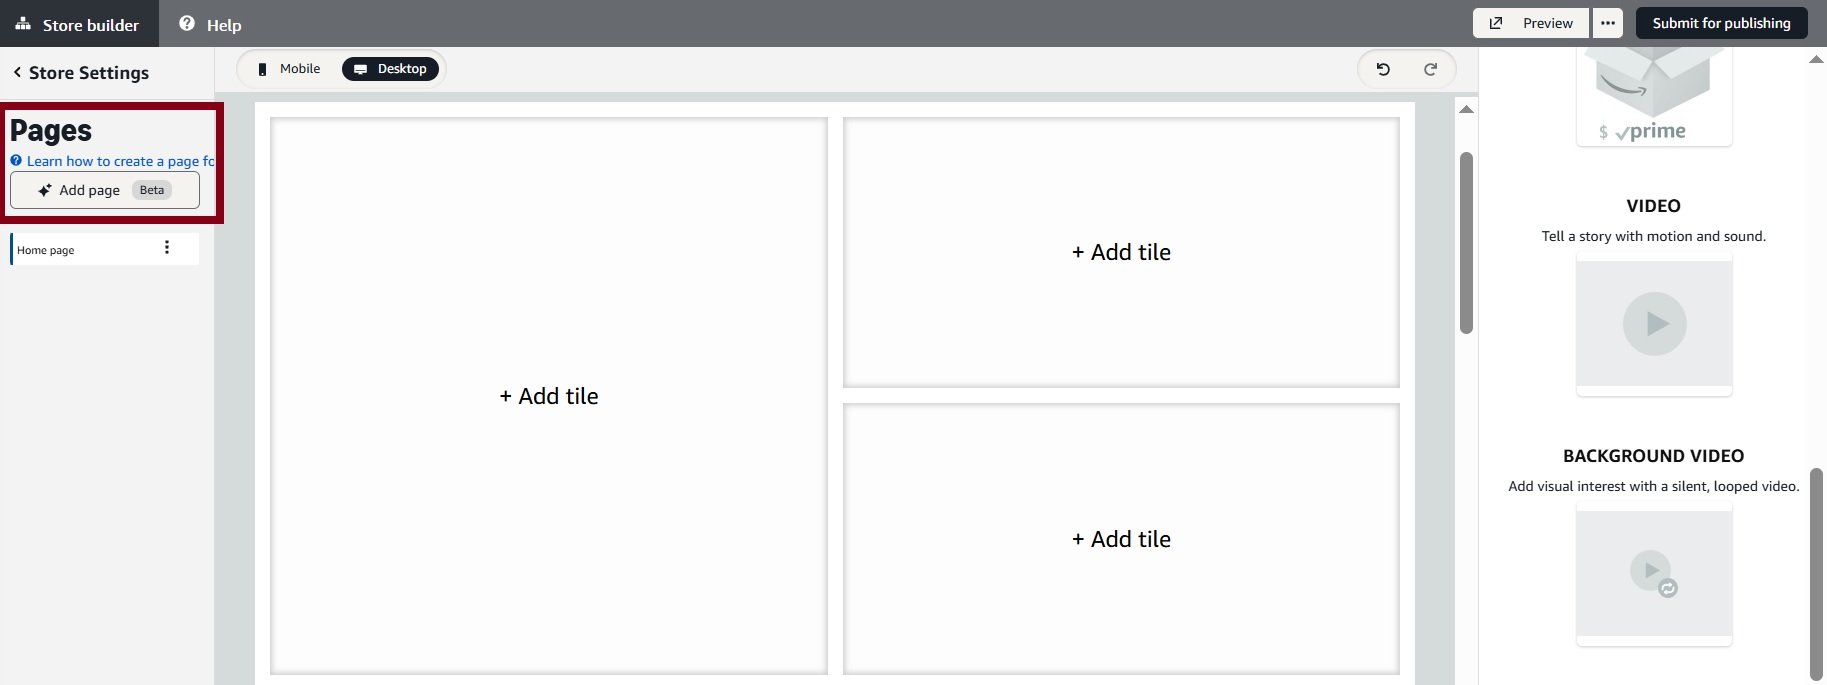
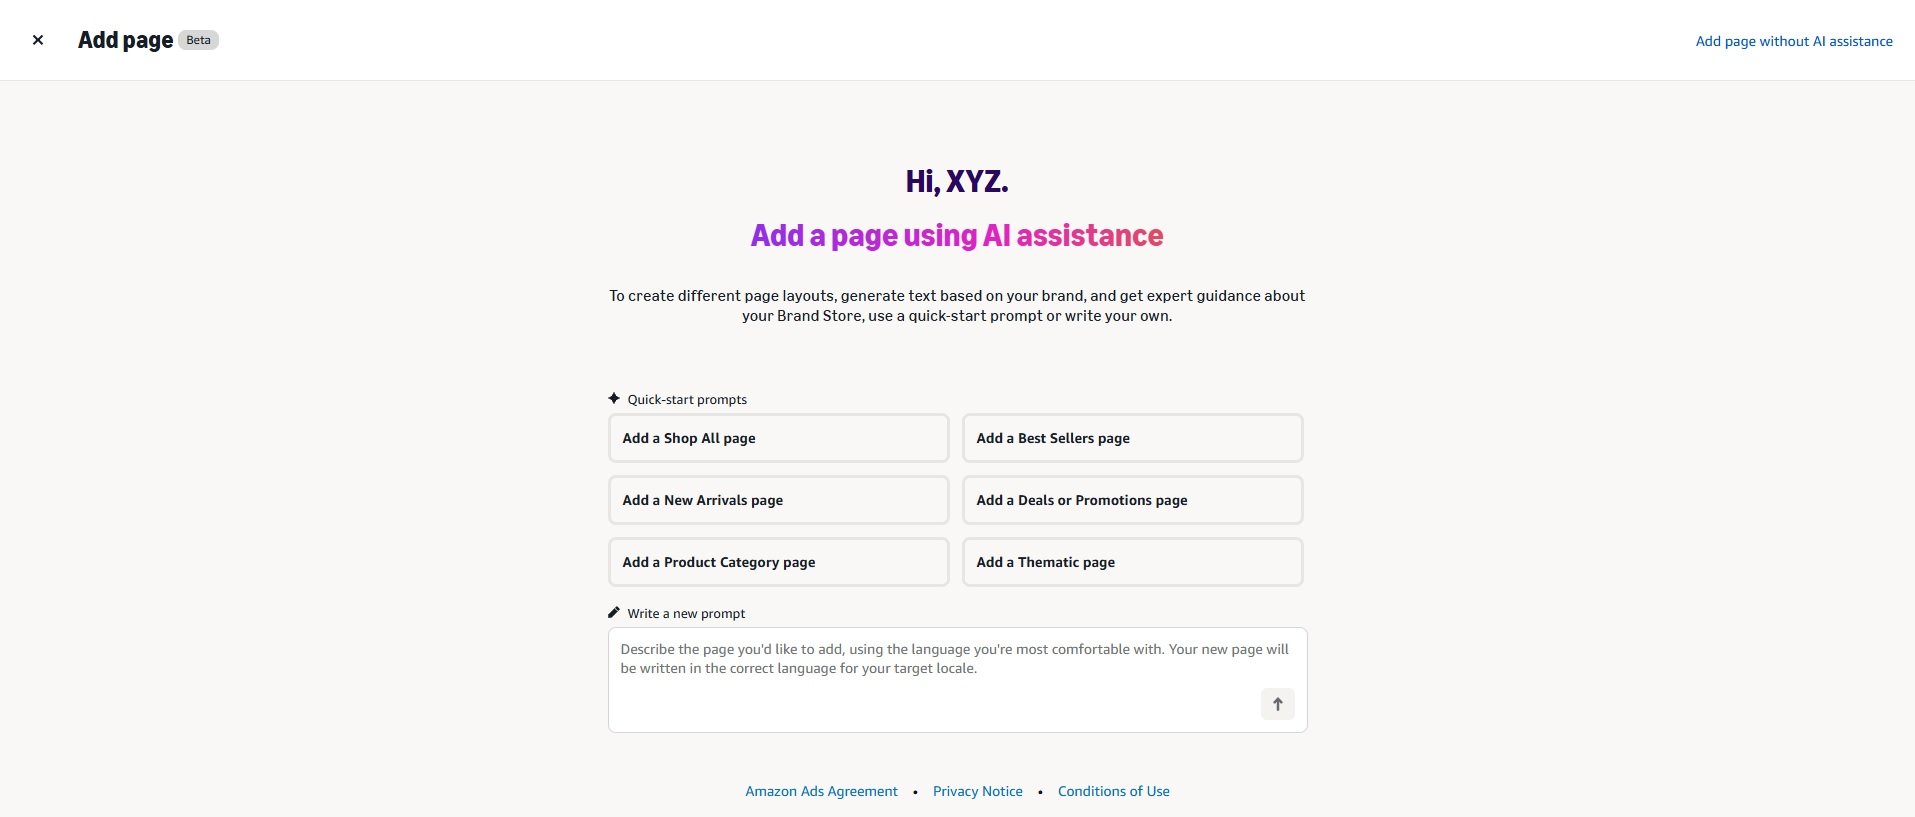
Now you can use create pages automatically with AI page builder in seconds. When you click “Add a page”, the next screen will show you pre-defined AI prompts. You can use these prompts to create or use one of your own. For example select “Create Best seller page” and Amazon will create page with all of your best selling products.
Step 7: Add Content Tiles to Each Page
Content tiles are the individual building blocks inside every Store page. You place them using a drag-and-drop interface, and Amazon offers a wide range of tile types.
Below is a reference guide to every available tile type, what it does, and when to use it.
| Tile Type | Function | Best Use Case |
|---|---|---|
| Product Tile | Shows a single product with its price, rating, and Add to Cart button | Featuring hero products or new arrivals |
| Image Tile | Displays a standalone image with no linked product | Brand aesthetics, lifestyle photography, mood-setting |
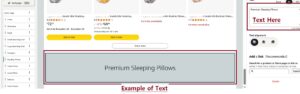
| Image with Text Tile | Combines an image with a headline and short body copy | Explaining product benefits, brand values, or category descriptions |
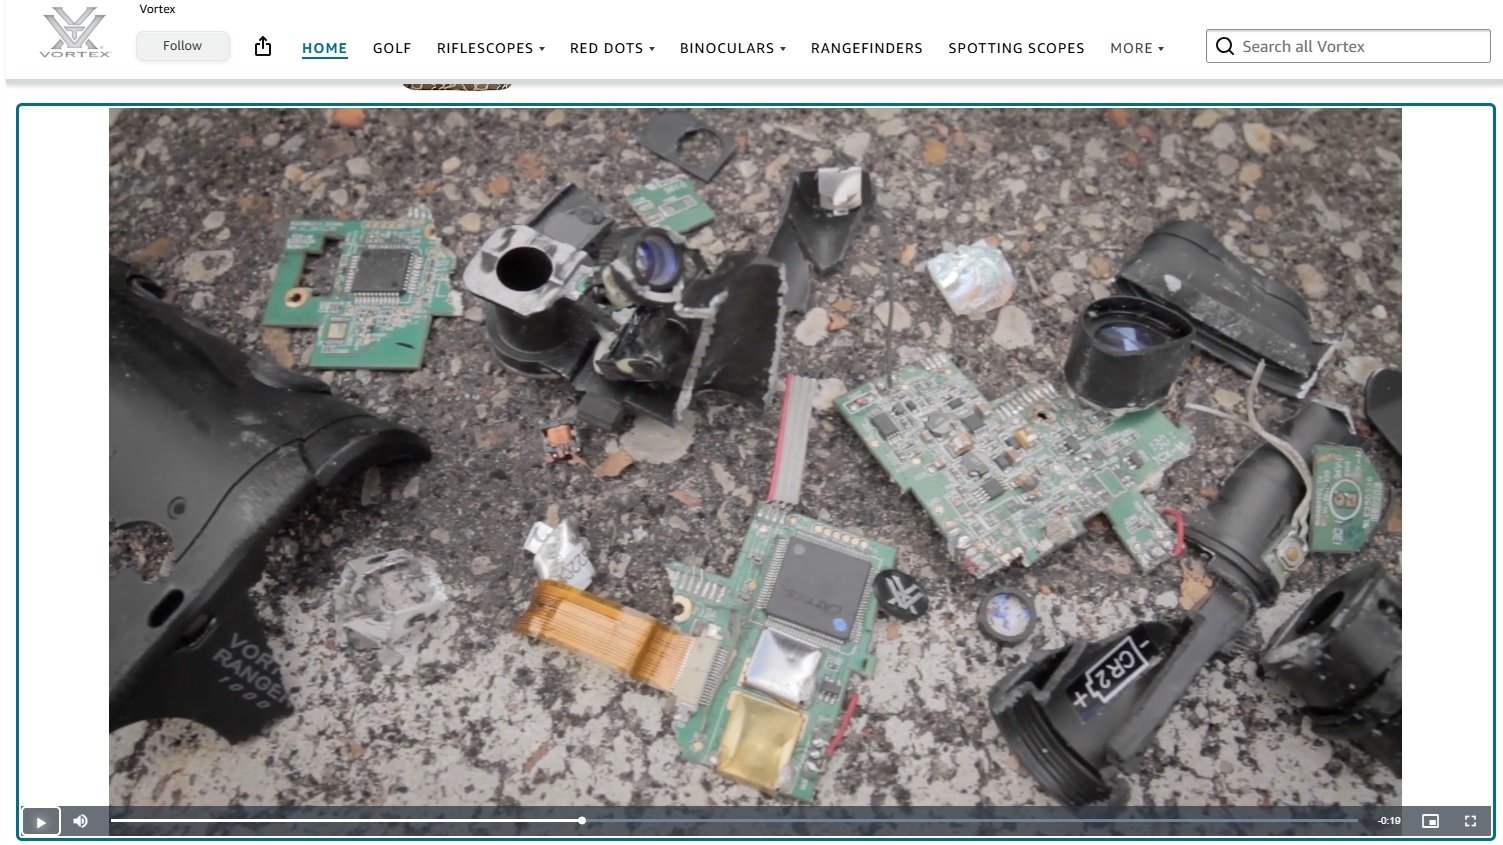
| Video Tile | Embeds a playable video directly on the page | Product demos, tutorials, brand story videos |
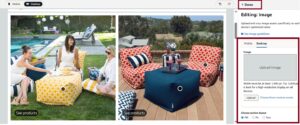
| Shoppable Image Tile | Allows hotspot tags on a lifestyle image linking to specific products | Showing multiple products in a real-life context (e.g., a styled room, outfit) |
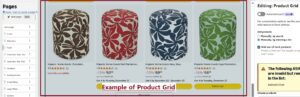
| Product Grid Tile | Displays multiple products in a grid layout | Category subpages with many SKUs |
| Best Sellers Tile | Auto-populates your top-selling products | Homepage highlights, social proof |
| Recommended Products Tile | Shows personalized product recommendations to each visitor | Cross-selling and increasing basket size |
| Deal Tile | Highlights products currently running a promotion or deal | Prime Day, Black Friday, Lightning Deals, coupons |
| Gallery Tile | Scrollable image carousel | Showcasing multiple lifestyle images in limited page space |
| Background Video Tile | Plays a full-width video behind other content elements | Premium storytelling, brand-level experience |

Shoppable image tile: Use this to add clickable points on products and link the relevant ASINs so customers can select a variation and view its listing.

There are so many other tiles that you can add depending on your goal. Here is how to add tiles.
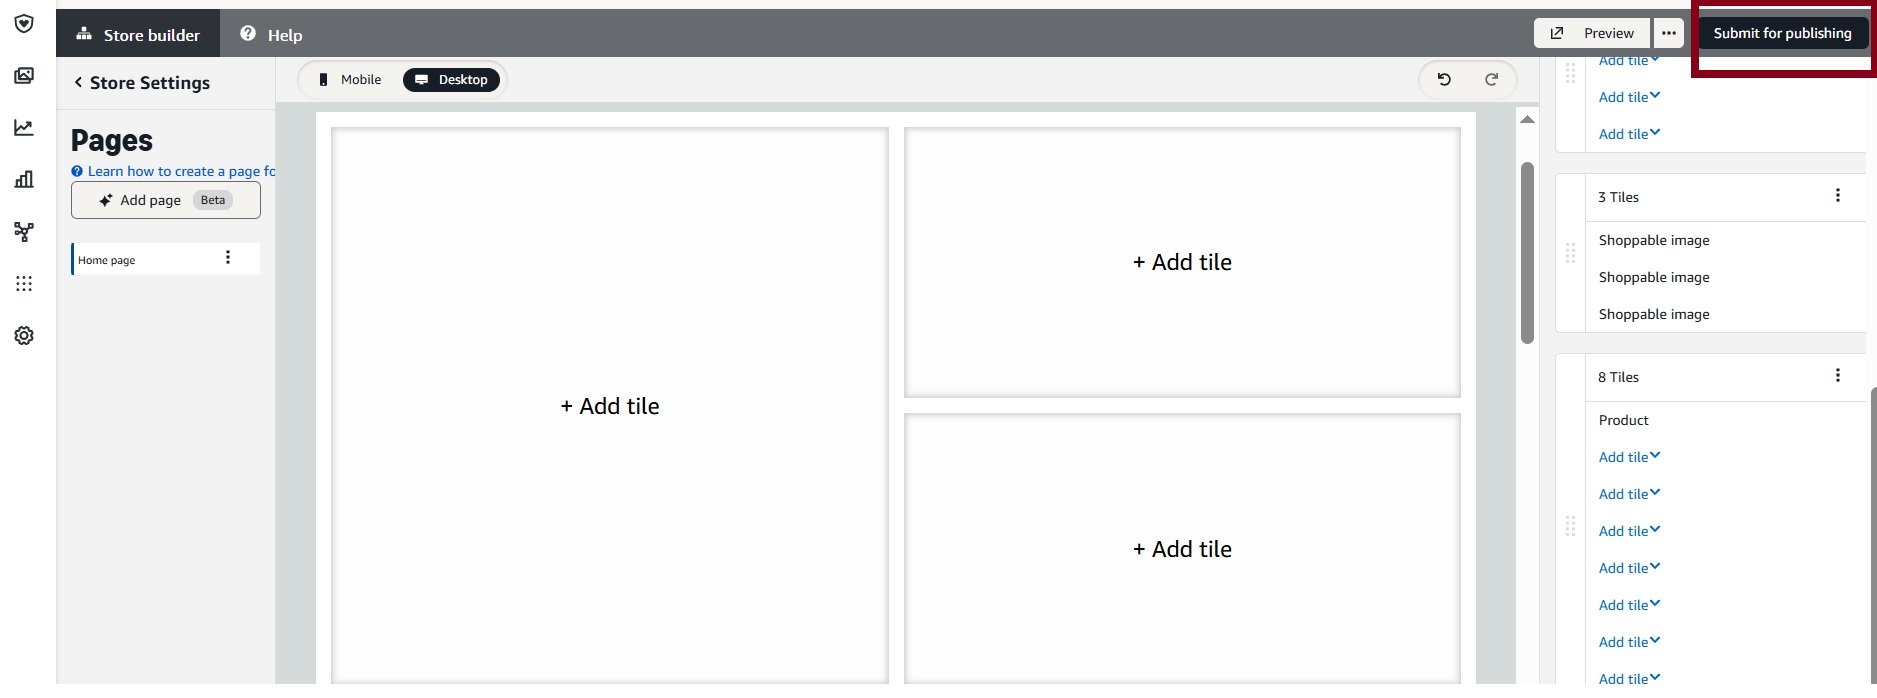
On any page in store, click on “Add new section” on left side as illustrated below.

Choose title type depending on what you are adding like image title, video tile etc.

Depending on the tile type enter details. If you are adding image tile then upload image along with other details and click on done.
The most effective Store pages mix multiple tile types. A page built entirely with product grids feels like a spreadsheet. Combine product tiles with imagery and video for the best results.
Step 8: Preview on Desktop and Mobile
This step is not optional. Before you submit, click the preview button and check your Store on both desktop and mobile views.
With roughly 70% of Amazon browsing happening on mobile devices, a Store that only looks good on desktop is failing the majority of its visitors. During your mobile preview, check for these specific issues.
- Text on hero banners that becomes unreadable on smaller screens
- Image cropping that cuts off important product details or brand messaging
- Tile stacking order that places less important content above key products
- Navigation bars with too many tabs (mobile screens display fewer tabs without scrolling)
If your hero banner includes text, keep it to 5 to 7 words maximum and position it in the upper two-thirds of the image. Amazon crops the bottom portion on mobile displays.
Step 9: Submit Your Store for Review
When you are satisfied with the desktop and mobile preview, click Submit for Publishing. Amazon’s moderation team manually reviews every Store submission for compliance with their creative acceptance policies.
Typical review time is 24 to 72 hours. During peak seasons like Q4 or around Prime Day, reviews may take longer.
What Gets Your Store Rejected
Amazon provides specific feedback when they reject a submission, but knowing the common triggers in advance saves you from unnecessary delays.
Here are the most frequent rejection reasons reported by sellers.
- Images containing pricing information, discount percentages, or promotional language like “Best Seller” or “#1 Rated”
- References to external websites, social media profiles, or non-Amazon platforms
- Contact information such as phone numbers, email addresses, or physical addresses
- Unsubstantiated product claims, especially health, safety, or performance guarantees
- Low-resolution images or visuals that appear blurry or pixelated
- Lifestyle imagery that violates Amazon’s community content guidelines
- Use of trademarked content or copyrighted material you do not own
Fix whatever Amazon flags and resubmit. Most second submissions get approved quickly as long as you address every noted issue.
Amazon Storefront Image and Video Specifications
Uploading assets that meet Amazon’s exact requirements on your first attempt prevents rejections and unnecessary rework.
Below is a quick-reference table covering the specifications for every major creative asset used in Amazon Stores.
| Asset Type | Recommended Dimensions | File Format | Additional Notes |
|---|---|---|---|
| Brand Logo | 400 x 400 px minimum | PNG or JPG | Transparent background recommended for clean display |
| Hero Banner (Desktop) | 3000 x 600 px | JPG or PNG | Avoid placing text in the bottom 20% due to mobile cropping |
| Hero Banner (Mobile) | 1500 x 600 px | JPG or PNG | Auto-cropped from the desktop version |
| Full-Width Image Tile | 1500 x 750 px minimum | JPG or PNG | Landscape orientation only |
| Product Tile Image | Uses existing ASIN main image | N/A | Pulled automatically from your product listing |
| Video | 1280 x 720 px minimum | MP4 | Maximum 5 minutes length, 500 MB file size, no external URLs |
| Shoppable Image | 1500 x 750 px minimum | JPG or PNG | Must contain clearly identifiable products for hotspot tagging |
| Gallery Image | 1500 x 750 px minimum | JPG or PNG | Used in scrollable carousel tiles |
Always upload the highest resolution file you have available. Amazon compresses images during processing, so starting with a sharp original ensures the final displayed version still looks professional.
Designing an Amazon Storefront That Converts
Having a live Store and having an effective Store are two different things. The design decisions you make on layout, imagery, navigation, and content placement directly affect how long shoppers stay and whether they purchase.
Open With Your Strongest Visual
Your hero image or background video is the first thing every visitor sees. It needs to instantly communicate what your brand sells and who your products are for. If you sell premium kitchen tools, show them in a beautiful kitchen setting. If you sell fitness supplements, show the product alongside active, health-focused imagery.
Generic stock photos signal low investment in your brand. Shoppers pick up on that immediately, and it erodes trust before they even look at a product.
Write Navigation Labels for New Customers
Build your navigation bar as if every visitor is discovering your brand for the first time. They should be able to find what they need from the labels alone without clicking around to figure out what each category contains.
Here are examples of effective versus ineffective navigation labels.
- “Wireless Earbuds” instead of “Audio Collection”
- “Face Moisturizers” instead of “Skin Solutions”
- “Dog Treats” instead of “Happy Pups”
- “Protein Bars” instead of “Fuel Up”
Clear, plain language wins. Save the creative copy for your brand story section.
Show Products Above the Fold
“Above the fold” means visible without scrolling. Your homepage should display at least one row of products or a shoppable image tile before the visitor scrolls down.
A common mistake new Store owners make is filling the entire top section with brand story content, mission statements, and lifestyle imagery while pushing actual products below the fold. This loses the significant percentage of shoppers who arrived ready to buy and will not scroll to find what they want.
Use Video on at Least One Page
Video tiles consistently drive higher engagement and longer time on page. You do not need a cinematic production. A clean 30 to 60-second product demonstration, a how-to guide, or a simple brand story video all work well.
Keep two things in mind with Store videos.
- Many mobile shoppers browse with sound off, so your video should communicate its message visually even without audio
- Videos under 60 seconds generally hold attention better than longer content in a shopping environment
Update Your Store at Least Every 90 Days
Amazon’s own data shows a 35% increase in attributed sales per visitor for Stores updated within the last 90 days. That alone justifies putting Store refreshes on your calendar.
Reasons to update your Store throughout the year include the following.
- New product launches that need visibility
- Seasonal promotions such as Prime Day, Back to School, Black Friday, and holiday gifting
- Updated lifestyle photography or rebranding
- Changes to your best-seller lineup
- Active deals or coupons you want to highlight using the Deal tile
Set a recurring quarterly reminder. Even small changes like swapping a hero banner or rearranging product order count as updates.
How to Drive Traffic to Your Amazon Storefront
An Amazon Store does not automatically attract heavy traffic just because it exists. You need to actively send shoppers to it through both Amazon’s own advertising ecosystem and external channels.
Traffic Sources Inside Amazon
Sponsored Brands Ads are the single most effective way to send targeted traffic to your Store. These ads appear at the top of Amazon search results and can link directly to your Store homepage or any subpage. Amazon’s own advertising data consistently shows that Sponsored Brands campaigns linked to Stores outperform those linked to individual product detail pages in return on ad spend.
Amazon Posts are free, social-media-style image posts that appear in your brand’s feed and on related product detail pages. Every Post links back to your Store. Posting daily or multiple times per week builds a consistent content presence that drives ongoing organic Store visits.
Brand Byline Links are the clickable brand name that appears below the product title on every listing. When a shopper clicks your brand name, they land on your Store. This happens automatically once your Store is live.
Amazon Live lets you host live-streamed product showcases with your Store link visible during the broadcast. This works especially well during promotional events and new launches.
Traffic Sources Outside Amazon
Amazon Attribution lets you create tracking links for external traffic from social media, email campaigns, Google Ads, blogs, and anywhere else you promote your brand. These links track which external sources drive Store visits and purchases, giving you clear data on what is working.
Social Media is a natural fit for sharing your Store URL. The vanity URL format (amazon.com/yourbrand) is clean, memorable, and easy to include in Instagram bios, TikTok descriptions, YouTube video descriptions, and Pinterest pins.
Email Marketing gives you a direct channel to existing customers. Include your Store link in newsletters, product launch announcements, restocking alerts, and post-purchase follow-up sequences.
Your Own Website can include a “Shop on Amazon” button linking to your Store, which is especially useful for customers who prefer Amazon’s checkout and shipping experience.
The Brand Referral Bonus
Amazon’s Brand Referral Bonus program gives sellers an average 10% bonus on qualifying sales driven through external traffic tracked with Amazon Attribution. This means sending outside traffic to your Store is not just a visibility strategy. It directly improves your margins on every sale generated from those sources.
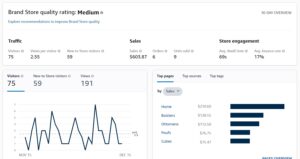
Store Insights: Your Analytics Dashboard
Amazon provides a dedicated analytics tool for every Store called Store Insights. Access it through Stores > Manage Stores > Insights in Seller Central.
Metrics Available in Store Insights
Below is a breakdown of every metric available in the Store Insights dashboard and what each one tells you about your Store’s performance.
| Metric | What It Measures |
|---|---|
| Daily Visitors | Unique shoppers who visited your Store on a given day |
| Views | Total page views across all Store pages (includes repeat views) |
| Sales | Revenue attributed to Store visitors within a 14-day attribution window |
| Units Sold | Total product units purchased by shoppers who visited your Store |
| Orders | Total number of orders placed by Store visitors |
| Views per Visitor | Average number of pages each visitor viewed (indicates browsing depth) |
| Sales per Visitor | Average revenue generated per individual Store visitor |
| Sales per Order | Average order value from purchases tied to Store traffic |
You can filter every metric by traffic source, including organic traffic, Sponsored Brands, Amazon Posts, and tagged external sources through Amazon Attribution.
Putting Store Insights to Work
Check which subpages produce the highest sales per visitor. Those pages have the strongest combination of content and product selection. Replicate what works on those pages across your other subpages.
If a subpage gets high traffic but low sales, the disconnect is usually one of three things: the wrong products are featured, the page layout is not guiding shoppers toward a purchase, or the products shown are priced too high relative to visitor expectations.
Compare performance by traffic source on a weekly basis. If Sponsored Brands drives the largest share of your Store revenue, that is a signal to increase your ad budget there. If Posts traffic is climbing, lean into a higher posting frequency.
Full Cost Breakdown for Running an Amazon Storefront in 2026
The Store builder itself costs nothing to use. But there are associated costs that every seller should budget for before launching.
Below is a breakdown of every cost involved in creating and maintaining an Amazon Storefront.
| Cost Item | Typical Amount | Frequency |
|---|---|---|
| Professional Seller Plan | $39.99/month | Monthly (required) |
| Amazon Brand Registry | Free | One-time enrollment |
| Trademark Registration (USPTO) | $250 to $350 per class | One-time (processing takes 8 to 12 months) |
| Trademark Attorney (optional) | $500 to $2,000 | One-time (recommended for first-time filers) |
| Product Photography | $500 to $5,000+ | As needed (depends on catalog size and quality level) |
| Graphic Design for Banners | $200 to $2,000+ | As needed (hero images, lifestyle graphics, branded tiles) |
| Video Production | $500 to $10,000+ | As needed (can range from DIY smartphone video to professional shoots) |
| Sponsored Brands Ads | Variable CPC | Ongoing (optional but strongly recommended) |
The biggest variable expense is creative assets. High-quality photography and branded graphics make a measurable difference in Store performance. However, you do not need a large budget to get started. Many successful sellers launch with smartphone photography, Canva-designed banners, and basic product demo videos, then reinvest revenue into professional-grade assets over time.
Amazon Storefront vs. Your Own E-Commerce Website
Brand owners frequently ask whether building an Amazon Store is worth the effort when they already have (or plan to build) their own website. These two channels serve fundamentally different purposes and work best when used together.
Below is a side-by-side comparison of how each channel performs across key factors.
| Factor | Amazon Storefront | Your Own Website |
|---|---|---|
| Setup Cost | Free (requires $39.99/month Pro plan + Brand Registry) | $29 to $299/month for platform, hosting, domain, and apps |
| Traffic Source | Built-in access to Amazon’s 300M+ active customer base | You must generate all traffic yourself through SEO, ads, and marketing |
| Buyer Trust | Backed by Amazon’s reputation, checkout, and return policies | You must build trust independently through reviews, design, and SSL |
| Customer Data | Limited access to aggregate data only (no customer emails) | Full ownership of customer emails, behavior data, and purchase history |
| Branding Control | Moderate, within Amazon’s template and tile system | Complete creative freedom over every element |
| Competitor Ads | No competitor ads appear on your Store pages | No competitors present at all |
| SEO Potential | Pages are indexed by Google but you have limited on-page SEO control | Full control over technical SEO, content strategy, and backlink building |
| Conversion Rate | Benefits from Amazon’s optimized checkout and Prime shipping trust | Typically lower conversion rates due to more checkout friction |
For most brands, the right answer is both. Use your Amazon Store to capture high-intent shoppers who are already on Amazon and ready to buy. Use your own website for long-term brand building, email list growth, content marketing, and owning your customer relationships.
Frequently Asked Questions
Is creating an Amazon Storefront free?
Yes. Amazon does not charge a separate fee for creating a Store. You need an active Professional selling plan at $39.99 per month and Brand Registry enrollment, both of which you likely already have if you are selling branded products on Amazon. The Store builder itself has no additional cost.
How long does Amazon take to approve a Storefront?
Most Store submissions are reviewed and approved (or sent back with feedback) within 24 to 72 hours. During high-volume periods like Q4 or the weeks around Prime Day, review times may extend slightly beyond that window.
Can I create an Amazon Storefront without Brand Registry?
No. Brand Registry enrollment is mandatory. You need an active registered trademark to qualify for Brand Registry, which then unlocks access to the Store builder along with other brand tools like A+ Content and Sponsored Brands ads.
Do Amazon Storefront pages appear in Google search results?
Yes. Amazon Store pages are indexed by Google and can show up in organic search results. However, you have limited ability to optimize on-page SEO elements compared to your own website. You cannot edit meta titles, meta descriptions, or URL slugs for individual Store pages.
What is the difference between an Amazon Storefront and an Amazon Influencer Storefront?
An Amazon Store is for brand-registered sellers who want to showcase and sell their own products through a custom, multi-page shopping experience. An Amazon Influencer Storefront is for social media content creators who curate and recommend products from any brand through the Amazon Influencer Program. They are completely separate programs with different eligibility requirements and purposes.
Can I see individual customer data from my Amazon Storefront?
No. Amazon does not share individual shopper identities, email addresses, or personal information with sellers. Store Insights provides aggregate data including daily visitor counts, page views, attributed sales, and traffic source breakdowns, but not individual-level data.
How many pages can my Amazon Storefront have?
Amazon Stores support up to three levels of page hierarchy in the navigation structure. There is no publicly stated hard cap on the total number of pages, but your navigation can go three levels deep. Most brands operate effectively with 5 to 15 total pages depending on catalog size and product diversity.
Can I share my Amazon Storefront link on social media and email?
Yes. Every Amazon Store has a unique vanity URL formatted as amazon.com/yourbrand. You can share this link freely on social media platforms, in email campaigns, on your website, and in any other marketing channel. Using Amazon Attribution tracking links for external traffic lets you measure exactly which channels drive visits and purchases.
How often should I update my Amazon Storefront?
Update your Store at least once every 90 days. Amazon’s published performance data shows that Stores updated within the last 90 days experience 21% more repeat visitors and 35% higher attributed sales per visitor compared to Stores that have not been recently refreshed.
Can I run A/B tests on my Amazon Storefront?
Amazon’s Manage Your Experiments tool supports A/B testing for A+ Content and product titles, but does not currently support direct A/B testing of Store pages. To test different Store layouts or content approaches, you can make changes and compare performance in Store Insights across equivalent time periods before and after the change.
What happens if Amazon rejects my Storefront submission?
Amazon provides specific feedback identifying exactly which elements violated their creative acceptance policies. Common issues include promotional language in images, references to external websites, unsubstantiated product claims, or low-resolution visuals. Fix the flagged issues and resubmit. Most corrected submissions are approved within 24 to 48 hours.