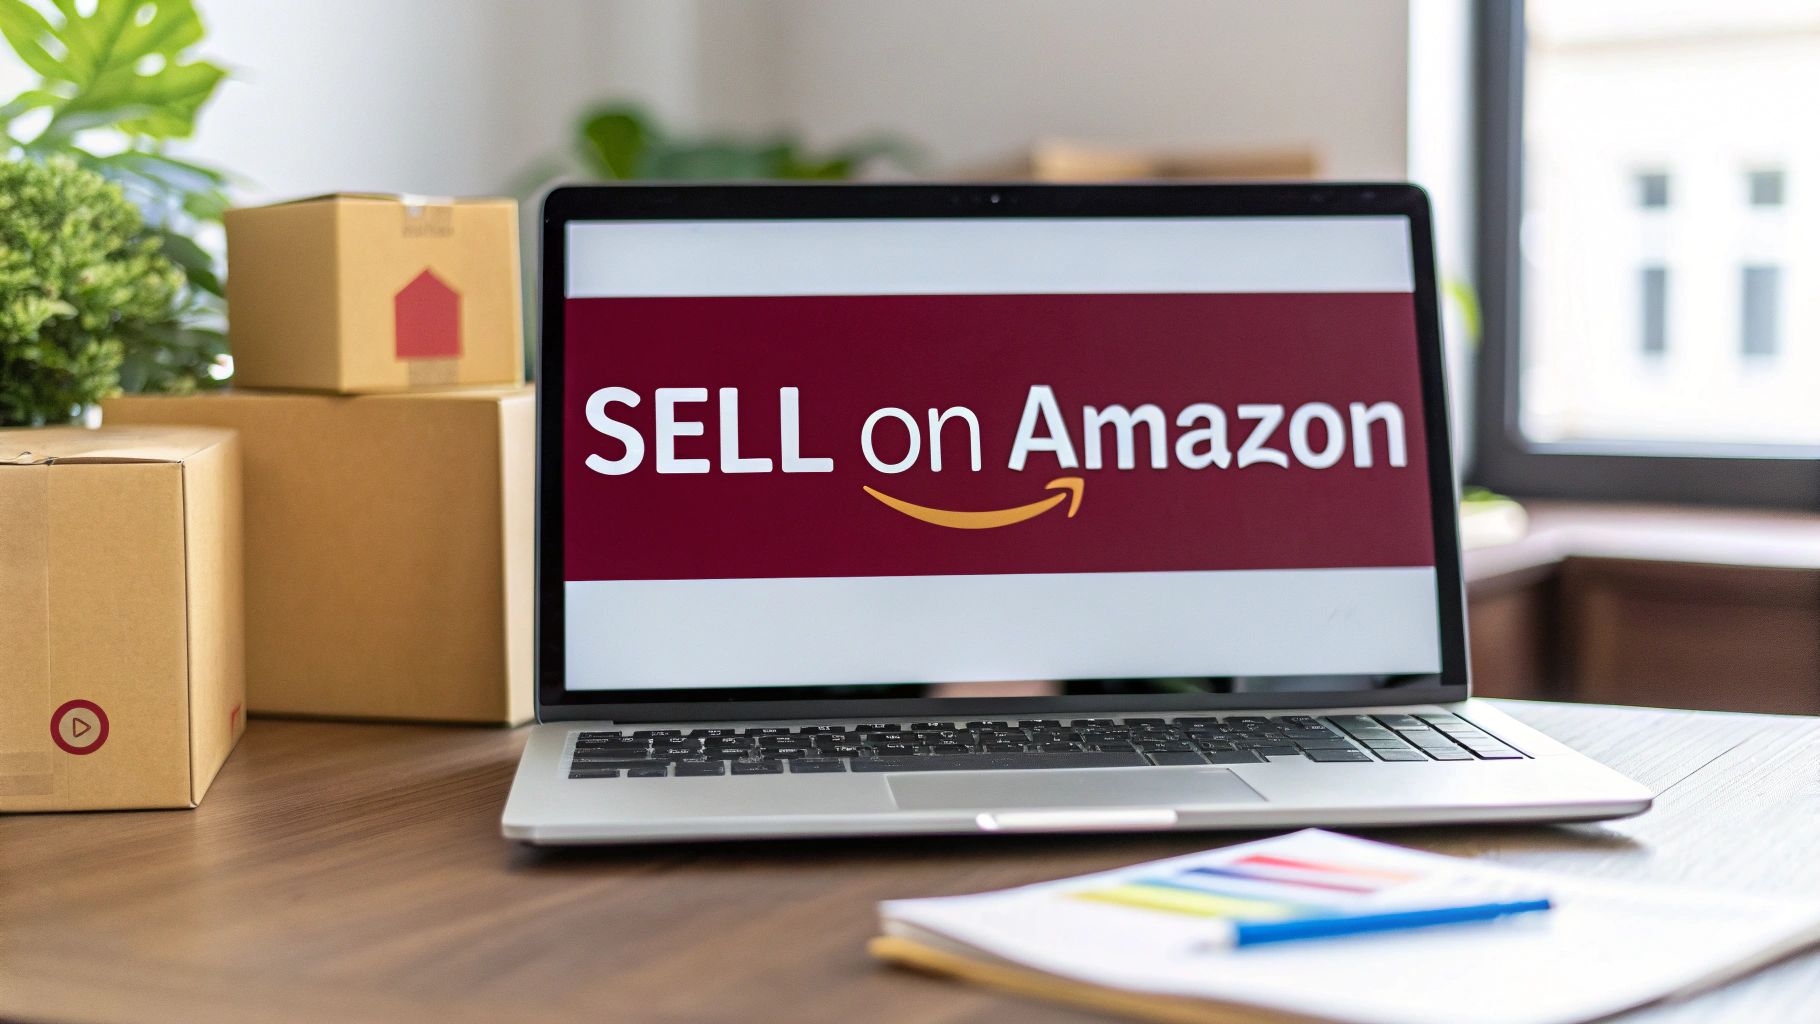
Millions try selling on Amazon every year, but most fail in the first 90 days. The difference between sellers who struggle and those who succeed is a clear process: choosing products that sell, understanding how Amazon ranks listings, and running campaigns that actually convert.
As of 2025, there are 9.7 million registered Amazon sellers, but only about 1.9 million are actually active. A huge reason for their success? Fulfillment by Amazon (FBA). Over 82% of sellers use FBA to let Amazon handle the packing and shipping, which is the key to getting in front of Amazon’s 220 million Prime members.
Amazon’s systems are smarter, buyers are more selective, and the competition is tougher. The A10 algorithm gives higher rankings to listings that convert better. Cheap, low-effort listings that once worked now fade out quickly. To grow a profitable Amazon FBA business, you need accurate product research tools like Helium 10 or Jungle Scout, and a clear understanding of your profit margins, fees, and advertising performance.
If you’re ready to start an online business that can actually last, this guide will show you how to build it one step at a time. You’ll learn how to source products with reliable margins, create listings that rank and convert, and use Amazon PPC advertising the right way.
Choosing Your Amazon Selling Model
Not every ecommerce business on Amazon works the same way. The right ecommerce business model depends on your budget, time, and long-term goals. Here are the main ones sellers use today:
- Private Label: This is the big one. You find a generic product, figure out how to improve it, and put your own brand on it. It’s the most involved path, demanding the most upfront work and capital, but it also offers the highest profit margins and the chance to build a real, sellable asset.
- Wholesale: Forget building a brand from scratch. With wholesale, you buy branded products in bulk from manufacturers or distributors and resell them. Your job is less about marketing and more about sniffing out profitable deals on products people already know and love.
- Retail/Online Arbitrage: This is the classic “buy low, sell high” hustle. You hunt for clearance deals in big-box stores (retail arbitrage) or on other websites (online arbitrage) and flip them on Amazon for a profit. It’s a fantastic way to learn the ropes of selling on Amazon with very little startup cash.
- Dropshipping: This business model lets you sell products without holding inventory. When a customer makes a purchase, you forward the order to a supplier, who then ships the product directly to the customer. This approach minimizes risk and reduces the need for initial capital.
- Kindle Direct Publishing (KDP): If you’re a writer or creator, this model is for you. You can publish ebooks and paperbacks directly on Amazon with zero upfront inventory costs. Your primary investment here isn’t money; it’s the time and effort you put into creating great content.
No matter which model you choose, think about scalability. Private label models usually offer more room to grow and can qualify for Amazon brand registry, which lets you access A+ content and detailed analytics.
Startup Cost of Amazon Business Models
To help you see the differences more clearly, below a quick comparison table. This breaks down the key factors that new sellers always ask about: how much money you need to start, how hard it is, and what kind of profit you can realistically expect.
| Business Model | Initial Investment | Difficulty Level | Typical Profit Margin |
|---|---|---|---|
| Private Label | $5,000 – $15,000+ | High | 20-35% |
| Wholesale | $3,000 – $10,000 | Medium | 10-20% |
| Arbitrage | $500 – $2,500 | Low | 8-15% |
| KDP (Digital) | < $100 | Low to Medium | 35-70% (royalties) |
| Dropshipping | $1,000-$3,000 | Low | 15-20% |
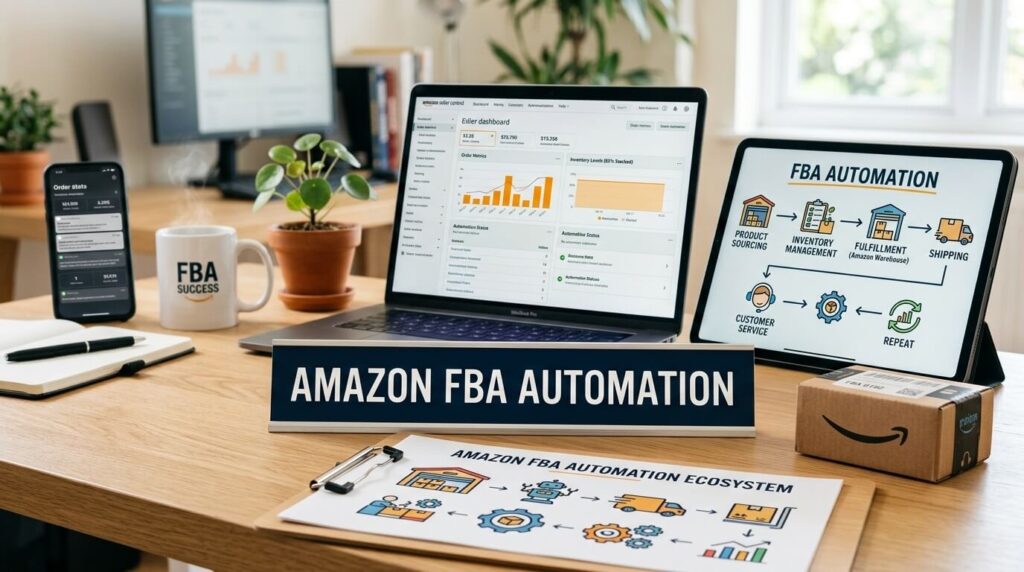
How Amzon Fulfillment Works
Fulfillment is how your products get to the customer. You have two main paths:
Fulfillment by Amazon (FBA): Amazon stores your inventory in its warehouses, packs orders, ships them, and handles returns. You pay FBA fees and costs, but you gain access to Amazon Prime eligibility, faster delivery, and higher conversion rates.
Fulfillment by Merchant (FBM): You store and ship products yourself or through a third-party service. You keep more control but need to manage shipping speed, tracking, and customer service.
Most new sellers start with FBA because it removes logistical headaches. However, once you understand your Amazon shipping requirements, margins, and customer expectations, you can mix both models to save costs.
Inside Amazon Seller Central
Inside your Seller Central dashboard, you’ll find everything that runs your Amazon business. It’s where you manage product listings, pricing, inventory, and Amazon PPC campaigns. This dashboard tracks seller metrics such as sales, PPC spent, ACOS/ROAS,order defect rate, late shipment rate, and feedback score. Keeping those metrics healthy is what helps you stay in good standing with Amazon.
If you want to scale, you’ll spend a lot of time here analyzing reports, checking search query performance, and tracking sales velocity. Think of it as your business control room.
Niche and Product Research
Every successful Amazon seller, whether they’re private label or wholesale, started by finding the right product to sell. This is where most people either set themselves up for success or fail before they even list. If you pick the wrong niche or skip proper research, it won’t matter how good your photos or ads are.
1. How to Identify a Profitable Niche
A profitable niche is one where there’s real demand but still room for new sellers. You’re looking for products that people search for every day, not just during trends. A quick check on the Amazon Best Sellers rank gives you an idea of what’s selling, but don’t stop there. Use data tools to understand how stable that demand is.
When you explore categories, look for these signs:
- Products priced between $20 and $60 usually hit the sweet spot for margin and impulse buying.
- Weight matters. Lightweight products keep FBA storage costs and shipping fees lower.
- Avoid fragile, oversized, or seasonal products at first. They drain your capital faster.
- Study reviews on similar listings. Hundreds of poor reviews signal opportunity if you can solve those same complaints.
2. Using Product Research Tools the Right Way
Many new sellers rely only on gut feeling. That’s risky. Use Jungle Scout software and Helium 10 tools to make smarter decisions. Always check profitability with Amazon FBA revenue calculator and include all of your costs like Amazon fee, cost of goods (COGS), shipping, and this will calculate the gross profit margins.
Below are the filters and checkpoints that reveal whether a product has real potential on Amazon.
- Demand & Market Opportunity
- Keyword Search Volume: At least 5,000+ searches/month for US market and 3,000+ searches/month for markets like Europe, Japan etc on main keyword.
- Sales Volume: Minimum 300 units/month per SKU; 150–299 is borderline
- Revenue Pool: Top 10 listings should generate at least $5,000–$15,000/month combined
- Competition Analysis
- Reviews: Top 3 listings should average <1,000 reviews; <500 is ideal
- Listing Quality Gaps: Look for weak photos, poor copy, or missing A+ Content among top sellers
- Price & Profitability
- Product Price Range: Ideal band is $8–$50
- Gross Margin: Minimum 25–30% after all costs; 30%+ preferred
- Landed Cost: Should not exceed 40% of the selling price
- Fees: Always calculate FBA fees, storage, and returns before moving forward
- Advertising Viability
- Target ACoS: Must be ≤30% to leave room for net profit
- CPC vs Margin: Break-even CPC must allow sustainable bids
- Listing & Conversion Readiness
- Conversion Potential: Aim for 15%+ session-to-order conversion rate
- Creatives: Must be able to produce images, video, and A+ that outperform incumbents within one cycle
- Logistics & Compliance
- Size/Weight Tier: Prefer standard-size products for predictable FBA fees
- Lead Time: Under 60 days is best; over 120 days is high risk
- Restrictions: Avoid gated, hazmat, or heavily regulated categories unless you have approval
- Supplier Backup: At least 2 reliable suppliers to reduce risk
- Strategic Upside
- Channel Expansion: Potential to sell on Walmart, Target, or DTC beyond Amazon
- Cross-Sell Potential: Opportunities for bundles, subscriptions, or repeat purchases
- Product Opportunity Explorer (POE) Validation
- Top 5 Product Click Share under 35%
- Top 20 Product Click Share under 70%
- Successful Launches (12 months) ≥20% of new launches
- Hard Stop Triggers
- Heavily gated or restricted categories without prior approval
Supplier lead times longer than 120 days with no alternatives
High IP/patent risk.
3. Amazon Keyword Research
Amazon runs on keywords. They’re not just for SEO they directly influence sales. A product listing that targets the wrong keywords might get impressions but no conversions.
Use these tools and tactics:
- Helium 10 Cerebro or Jungle Scout Keyword Scout to find high-converting search terms.
- Use Amazon brand analytics Top Search Terms section to uncover more related keywords.
- Track seasonal changes. A keyword that peaks in summer may slow down in winter.
Keyword research is the foundation of every successful Amazon strategy. It determines how your listing is indexed, how visible you are in search, and how much you end up paying in ads. If the right keywords are missing, your organic reach stays limited and your PPC campaigns become more expensive. Below is the process to find relevant keywords.
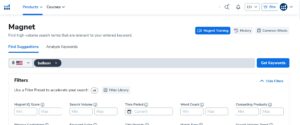
- Helium10 Cerebro: Reverse ASIN tool that reveals competitor keywords and ranking opportunities.

- Helium10 Magnet: Generates a broad pool of keyword ideas with search volume data.
4. Analyzing Competitors and Finding Gaps
Before choosing a product, analyze at least 5–10 top listings for your main keywords. Check:
- Price range and average review count.
- Quality of photos and videos.
- Common complaints in reviews.
- Missed features or packaging gaps.
For instance, if most listings sell a yoga mat without a carrying strap, adding one could instantly make yours stand out. These small improvements often make the biggest difference in conversion rate optimization.
5. Sourcing Products and Calculating True Costs
For private label product sourcing, the journey begins on Alibaba. Think of it as a massive B2B directory where you can find factories to make just about anything imaginable. The goal here isn’t to find the cheapest supplier, but to find a reliable, long-term partner.
This is the main search page on Alibaba. It’s pretty straightforward. You’ll type in what you want to make and start digging through the results.
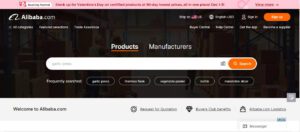
Before you even start searching, pay close attention to the filters for “Verified Supplier” and “Trade Assurance.” These are your first line of defense. Ticking these boxes helps weed out sketchy operators and adds a layer of protection to your order. Honestly, I wouldn’t even consider a supplier without them.
5.1. Finding and Vetting Suppliers on Alibaba
Once you search for your product, you’re going to see a flood of listings. Don’t panic. Your immediate goal is to simply build a shortlist of 5-10 potential suppliers to contact.
Here’s a quick checklist for vetting suppliers at a glance:
- Verified Supplier: This badge means Alibaba has done some basic due diligence, like verifying their business license and checking out their factory. It’s a must-have.
- Trade Assurance: This is Alibaba’s payment protection program. If your final product isn’t what you agreed on, you have a way to dispute it and potentially get your money back. Never, ever work with a supplier who doesn’t offer this.
- Years in Business: Look for factories that have been on the platform for at least 3-5 years. It’s a good sign of stability and that they know what they’re doing.
- Response Rate: I like to see a response rate above 85%. It tells me they’re active, engaged, and likely to get back to me in a timely manner.

Once you’ve got that shortlist, it’s time to reach out.
Pro Tip: Draft a template for your initial outreach message to save time, but always take a minute to customize it for each supplier. Mention something specific from their company page or product listing. A little personalization shows you’re serious and can bump you to the top of their reply list.
5.2. What to Ask Your Potential Supplier
Your first message should be professional, clear, and straight to the point. You’re trying to accomplish three things: confirm they can make what you want, get an initial quote, and find out their Minimum Order Quantity (MOQ).
Here’s a simple script you can adapt:
- Start with a brief introduction of yourself and your brand.
- Clearly state which of their products you’re interested in (a link to their listing is helpful).
- Ask for their MOQ.
- Request tiered pricing for your initial order (e.g., pricing for 500 units vs. 1,000 units).
- Inquire about the cost and lead time for a sample.
- Ask if they can make the specific improvements you identified in your research (e.g., “Can you use a stronger zipper?” or “Is it possible to add a reinforced handle?”).
The quality of their response tells you everything. A great potential partner will answer every question clearly and thoroughly. A supplier who gives you one-word answers or just a price is a red flag.
5.3. Never Skip the Sample Phase
After some back and forth, you’ll likely narrow your list down to 2-3 top contenders. Now for the most important step: order samples from each of them.
I cannot stress this enough. Photos look great online, but you absolutely have to hold, test, and feel the product before you commit thousands of dollars to a bulk order of 500 or 1,000 units.
It is recommended to start by paying 30% of the total amount to the supplier. The remaining 70% should be reserved for when the inventory is fully prepared and ready to be delivered.
When the samples arrive, be ruthless.
Inspect every single detail. Check the quality of the materials, the stitching, the colors, the packaging, everything. Does it feel cheap? Does it function correctly? How does it stack up against your top competitor’s product?
This is your final quality check. If a sample isn’t up to par, don’t be afraid to provide feedback and ask for a revised sample, or just walk away entirely. Getting this right from the start is critical for launching an ecommerce business on Amazon and will save you from a mountain of bad reviews and costly returns later on.
Your goal is at least a 25% net profit margin after all expenses. Anything below that becomes hard to sustain when ad competition increases.
Setting Up Your Amazon Seller Account
Getting your Amazon seller account set up correctly is the first real step toward building your business. Think of it as the foundation of your store. If you rush this part or skip key details, you’ll run into problems later with account verification.
1. Choose the Right Selling Plan
When you register, Amazon gives you two main options: Individual Seller Plan and Professional Seller Account.
Individual plan: Best if you’re just testing the waters or plan to sell fewer than 40 units per month. You don’t pay a monthly subscription, but Amazon charges a small fee per item sold (usually $0.99). You also miss out on key selling tools like bulk uploads and advanced reports.
Professional plan: Designed for serious sellers. It costs $39.99 per month, but gives you full access to inventory management, advertising tools, and the Brand Registry program once you’re eligible. You also get data insights like search query performance and brand analytics dashboard reports that help you optimize for long-term growth.
2. Complete Seller Registration and Verification
Once you’ve picked your plan, Amazon requires detailed information to verify your identity and business. The platform has tightened its compliance process to reduce fake accounts and counterfeit activity. Here’s what you’ll need to prepare:
- Government-issued ID (passport or national ID)
- Bank account information for deposits (must match your business name)
- Credit card for billing fees
- Business registration or tax details (EIN for U.S. sellers, VAT for Europe)
- Valid phone number for two-step verification
Make sure the details you enter match exactly with your documents. Even small mismatches in spelling or formatting can delay approval.
If you plan to sell in multiple marketplaces like the U.S., Canada, or UK, you can use the Amazon Global Selling setup, which links all regional accounts under one dashboard.
3. Amazon’s Approval and Compliance Rules
Not every category on Amazon is open to new sellers. Some are restricted product categories, meaning you’ll need approval before listing. Common examples include beauty, groceries, supplements, and fine jewelry. Amazon calls this the ungating process.
To apply for ungating, you’ll usually need:
- Proof of product authenticity
- A photo of product packaging with your brand name or logo
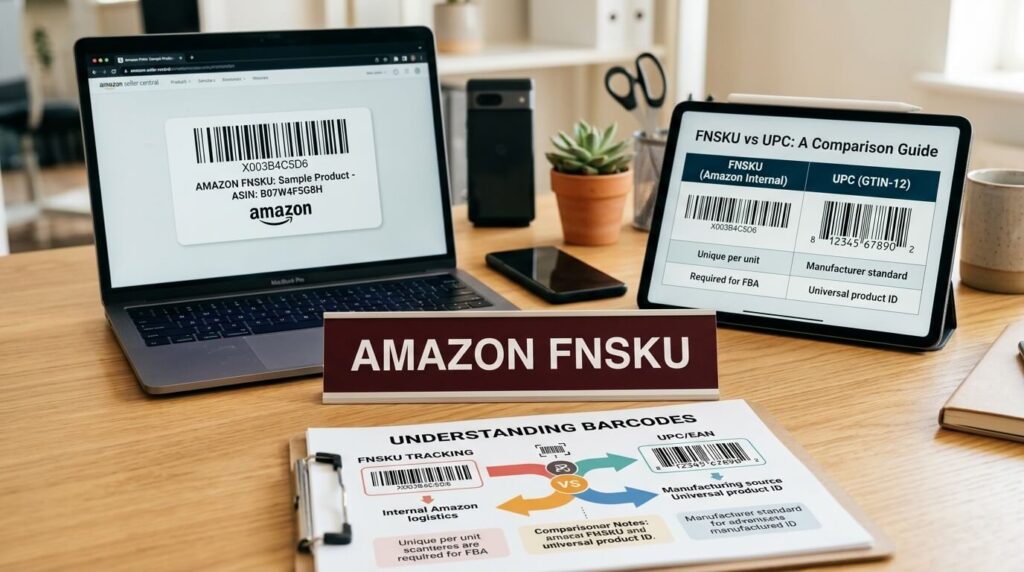
Also check UPC barcode requirements and product identifier codes. Each product needs a unique ASIN creation code linked to a valid UPC. If you’re creating a private label item, you can buy GS1 barcodes directly from the GS1 organization (never from cheap resellers).
Amazon may also ask for compliance certificates depending on your category – for instance, toy safety reports or FDA documentation for supplements.
4. Setting Up Your Brand and Storefront
Once your account is verified, it’s time to build your presence. If you’re selling private label products, this is where you establish credibility.
Start with your Amazon storefront setup. Choose a clear logo, consistent product images, and a short brand story that feels personal. You can design an attractive A+ content design or Enhanced Brand Content section that shows your product features, comparisons, and visuals.
Register your brand in the Amazon Brand Registry once your trademark is active. This unlocks several advantages:
- Protection against counterfeit listings
- Access to A+ content and video modules
- Detailed brand analytics including market basket analysis and customer demographics data
- Additional ad formats like Sponsored Brands campaigns
These features not only increase conversion rates but also improve your ranking potential. Shoppers trust listings that look professional, and Amazon’s algorithm rewards higher engagement rates.
5. Set Up Your Payment, Tax, and Legal Structure
Getting paid smoothly is critical. Connect a reliable business bank account that matches the country of your marketplace. For example, if you sell on Amazon.com, link a U.S. account. If you’re outside the U.S., Amazon supports global payments through its Currency Converter for Sellers.
Next, set up your tax profile. Enter accurate details for sales tax collection (U.S.) or VAT requirements (EU). Amazon now automatically calculates and remits sales tax in several U.S. states, but you should still verify your obligations through your local tax advisor.
Listing Creation and Optimization for Amazon
Once your Amazon seller account is active, your next move is building listings that actually convert. Amazon product listing is just like a digital salesperson that does the talking, convincing, and selling 24/7. A weak listing might still get traffic, but it won’t bring in sales.
Most new sellers underestimate listing optimization that impacts indexing, ranking, click-through rate (CTR), and conversion rate. Let’s break this down step by step.
A well-optimized product listing serves two audiences:
- Amazon’s A10 algorithm, which determines your organic ranking.
- The customers, who decides whether to click and buy.
Your goal is to create listings that clearly show relevance for the algorithm but feel natural and trustworthy for humans.
1. Product Title Optimization
Your title is one of the strongest ranking factors in Amazon SEO, and also the first thing shoppers see in search results. It needs to be keyword-rich and readable.
Best practice for 2025:
- Keep titles between 150–180 characters.
- Include your main keyword in the first 70-80 characters.
- Mention your brand name at the start of title.
- Avoid keyword stuffing or special characters like “!!” or “**”.
3. Bullet Points Writing that Converts
Your bullet points (the “key product features”) are where shoppers look for clarity. They should answer questions buyers already have in their minds.
Each bullet should be benefit-driven and scan-friendly:
- Bullet 1: Main feature and direct benefit.
- Bullet 2: Material, design, or size details.
- Bullet 3: Use case or lifestyle fit.
- Bullet 4: Quality assurance, warranty, or safety info.
- Bullet 5: Brand credibility or support promise.
3. Product Description Strategies and A+ Content
Your product description is where you expand the story. It should connect emotionally and practically by explaining why your product solves a problem better.
If you’re enrolled in Amazon Brand Registry, upgrade your description with A+ content design. This allows for image banners, comparison charts, and formatted text that improve both SEO and conversion.
5. Amazon Product Photography Tips
Amazon’s product image rules haven’t changed much, but the competition has. Shoppers expect professional-quality photos even from small brands.
Follow these updated photography tips:
- Use 1 main image with a pure white background (per Amazon’s policy).
- Include 6–8 secondary images showing product use, dimensions, and benefits.
- Add a comparison image showing scale or key features side by side.
- Show lifestyle images that reflect the target audience.
- For small items, include zoomed-in texture or detail shots.
If you’re launching a private label product, invest in at least one 3D render or infographic image. It helps communicate features fast and reduces return rates.
6. Backend Keywords Strategy
Backend keywords (hidden search terms know as ‘generic keyword’) help you capture extra keywords without cluttering your main listing.
In Seller Central, go to your listing edit page → “generic keyword” tab → fill in the “Search Terms” field.

Backend keyword rules (2025):
- Up to 500 bytes total (not characters).
- No repetition of visible keywords on main listing.
- Don’t use commas, quotes, or brand names.
- Include alternate spellings, plural forms, and regional terms.
A balanced Amazon SEO strategy combines keyword relevance, conversion data, and buyer engagement. Track your listing performance through the Search Query Performance report inside Brand Analytics Dashboard.
7. Listing Optimization Metrics to Track
Amazon now measures listing health using actual shopper behavior. Pay attention to these Amazon seller metrics:
- Click-Through Rate (CTR): Aim for 0.5% or higher in most categories.
- Conversion Rate: Average across Amazon is 10–15%, but top listings can hit 25%+.
- Session Percentage: Tracks how often your listing is viewed compared to others.
Low CTR means your title or main image needs work. If your CTR is less than 0.5% then consider changing your main image. Low conversion means your pricing, reviews, or A+ content need testing.
Use tools like Helium 10 Listing Analyzer, Amazon Business Reports or Amazon Brand Analytics to measure your organic ranking factors and compare them to top competitors.
Product Launch Strategies and Ranking
Launching your first product on Amazon is one of the most exciting steps in building your ecommerce business on Amazon, but it’s also the stage where most sellers lose money fast. The truth is, launching a product in 2025 is not about quick giveaways or fake reviews anymore. Amazon’s A10 algorithm rewards relevance, engagement, and buyer trust, not manipulation.

A strong launch strategy should help you achieve one goal: consistent sales velocity that signals real demand. That’s what drives long-term organic ranking.
1. How the Amazon A10 Algorithm Impacts Launches
Amazon’s A10 algorithm now pays more attention to following KPIs in your seller central:
- Sales velocity (consistent daily orders)
- Click-through rate (CTR)
- Conversion rate (CVR)
- Customer satisfaction metrics like reviews & ratings
Ranking spikes from giveaways or short bursts of PPC no longer last. The algorithm favors stable performance over time.
2. Pre-Launch Preparation
Before going live, your listing should be completely ready. Here’s a quick checklist before launch:
- SEO-optimized product listing
- At least 7 high-quality product images with clear benefits
- A+ content if your brand is registered
- 15–30 product reviews by enrolling your in Amazon Vine.
- Price set competitively (within the top 20% of your niche)
- FBA inventory fully checked in and available at the Amazon fulfillment center
If you launch with missing details, you’ll pay for clicks that don’t convert, which hurts both your ranking and ad performance.
3. Amazon PPC for Initial Sales
Amazon rewards listings that generate consistent sales early. To get momentum, you need both organic and paid traffic. Amazon PPC is one of the best way to generate inital sales.
1. Campaign Structure
A clear campaign structure is critical for managing budgets and analyzing results. Use a tiered setup that separates match types and focuses spending where it matters.
Recommended structure:
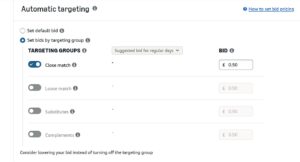
- 1 Auto Campaign (one each match type Close match, Loose match, Substitutes, and Complements )
- 1 Broad Match Campaign (For low CPC)
- 1 Phrase Match Campaign (for low CPC)
- 1 Exact Match Campaign (ranking)
Auto Campaign:
Start with a moderate bid and let Amazon find converting search terms. After a week or two, pull the Search Term Report from your Seller Central dashboard. Move converting terms into manual campaigns and add poor performers as negatives.
Broad and Phrase Campaigns:
These help you explore variations of your core keywords. Keep bids balanced to gather data without overspending. Also these campaigns come up with low CPC and low ACOS.
Exact Match Campaign:
Target top 15 keywords in Exact PPC campaigns with no more than 5 keywords per campaign. These campaigns usually bring the highest organic juice towards higher product ranking. Focus 70% of your budget here.
2. Effective Amazon PPC Strategy
The most effective way to start is by setting up two specific campaign types right away.
- Manual Targeting “Exact Match” Campaign: Select your top 5 keywords and create separate exact match campaigns for each one. For the next 10 to 15 keywords, organize them into groups of 5 to 10 per campaign in SP Exact campaigns. This approach ensures your product reaches highly relevant customers.
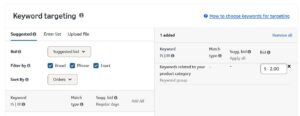
- Manual Targeting “Broad & Phrase Match” Campaign: Take your top 5 most important keywords from your initial research and create separate broad match and phrase match campaigns for each one. For the remaining 10 to 15 keywords, use 5 to 10 keywords per campaign for the broad and phrase match campaigns. This approach will help your product reach customers who are closely related to it and discover new profitable search terms.
- Automatic Targeting: Avoid starting automatic targeting immediately. Instead, wait 2 to 3 weeks before beginning these campaigns. These ads are Amazon keyword research campaigns where algorithm will display your ad to likely interested shoppers. Allow it to run for a week or two to collect valuable customer search terms.
- Track your ACOS & TACOS: ACOS (Advertising Cost of Sales) is calculated using the formula: ACOS = (Ad Spend / Ad Revenue) x 100. This metric indicates the percentage of sales revenue spent on advertising. TACoS (Total Advertising Cost of Sales) is calculated as: TACoS = (Ad Spend / Total Sales) x 100, and it reflects the portion of total sales dedicated to advertising expenses.
- Tracking ACOS is important because it helps businesses determine the efficiency of their advertising campaigns by understanding the relation between ad spend and revenue generated.
- TACoS, on the other hand, provides a broader perspective on how advertising costs influence overall sales performance.
- For example, if you spend $200 on advertising and generates $1,000 in ad revenue, the ACOS would be 20%. If the total sales, including organic sales, amount to $2,000, the TACoS would be 10%.
- Monitoring these metrics enables businesses to optimize their advertising strategies and budget allocations effectively.
Don’t panic when you see a high ACoS (Advertising Cost of Sale) in your first few weeks. It’s totally normal for launch campaigns to run at a loss. You’re paying for data and sales velocity, not profit. Start with a modest daily budget, maybe $25-$50 per day, and keep a close eye on it.
- After launching your product, download Amazon PPC data after 2-3 weeks to optimize Amazon PPC campaigns. The main report you will download is ‘Amazon Search Term (STR) Report’. The search term report provides valuable insights into customer search behavior, revealing which keywords are driving traffic and conversions. Based on the data aincrease bids for high performing terms and remove ineffective keywords that only spent without sales. Download STR report weekly and do optimization. For details on Amazon PPC optimization see this guidline on Amazon advertising strategies.
3. PPC and Organic Ranking Connection
PPC is not just for sales. It directly feeds your organic ranking. Every sale from an ad tells Amazon your product is relevant for that keyword. Over time, your listing begins to climb organically, reducing your reliance on ads.
To maximize this effect:
- Target top 10-15 keywords in SP Exact campaings with high bids.
- Keep target keywords in start of your title and bullet points.
- Keep sales velocity consistent.
- Maintain healthy account metrics and inventory.
Managing Inventory and Long-Term Growth
Once your products start selling consistently, the challenge shifts from launching to managing inventory and tracking growth. Many new sellers make money early, then lose it later because they don’t track important KPIs. Post-launch management is about keeping your operation healthy by staying in stock, maintaining high performance scores, and managing cash flow efficiently.
1. Why Inventory Management Matters
Running out of stock doesn’t just stop your sales, it hurts your ranking. When Amazon detects that your product is unavailable, your organic placement drops and it takes a lot of PPC budget to regain those ranks.
Overstocking, on the other hand, ties up cash and increases FBA storage fees, especially during Q4 when rates surge.
Your goal is to balance stock levels so you always have enough to meet demand without paying unnecessary storage costs.
Use the Inventory Performance Index (IPI) inside Seller Central to track how well you manage your stock. A score above 400 is healthy. Scores below that can limit how much inventory you can send to Amazon.
2. Tools and Formulas for Smart Inventory Planning
Use Amazon’s Restock Inventory Tool for a baseline, but refine it using your own data.
Here’s a simple formula to calculate reorder quantity:
Reorder Quantity = (Average Daily Sales × Lead Time in Days) + Safety Stock
- Average Daily Sales: Use the past 30 days of sales data.
- Lead Time: The time between placing an order and receiving stock at the fulfillment center.
- Safety Stock: A 10–20% buffer in case of delays or unexpected spikes.
To avoid running blind, connect tools like SoStocked, Sellerboard, or InventoryLab. They integrate sales velocity, lead time, and FBA limits for accurate forecasts.
4. Working with Suppliers and Freight Forwarders
Reliable suppliers are the foundation of consistent cash flow. Build strong relationships by:
- Ordering with clear written contracts or purchase orders.
- Confirming lead times and packaging standards before every order.
- Requesting pre-shipment inspections to avoid quality issues.
- Paying through secure methods like Alibaba Trade Assurance or wire transfer to verified companies.
For logistics, use trusted freight forwarders who specialize in Amazon FBA delivery (such as Flexport, Freightos, or Unicargo). They can handle door-to-door shipping, customs clearance, and labeling directly to Amazon warehouses.
5. Automating Operations
Once you’re stable, start automating repetitive tasks to save time and reduce human error.
Examples of automation tools:
- Helium 10 Inventory Protector for stock monitoring
- FeedbackWhiz for review requests
- Sellerboard for profit analytics
- SoStocked for inventory forecasting
- RepricerExpress or BQool for price optimization
Automation helps you focus on what grows your business: new product development, marketing, and scaling.
6. Protecting Profitability
Profit doesn’t come from sales, it comes from what you keep after costs. Use your Profit and Loss statement (P&L) monthly to track:
- Gross sales
- FBA and referral fees
- Advertising costs
- Cost of goods sold (COGS)
- Refunds and returns
- Net profit
Keep your net profit margin above 15–20% wherever possible. If ad costs rise, improve your listing conversion rate rather than cutting corners on quality.
7. Track Metrics that Drive Long-Term Growth
Once your sales increase, data management becomes important. Keep dashboards for:
- ACoS and TACoS trends
- Conversion rate by keyword
- Organic rank position tracking
- Customer repeat purchase rate
- Average order value (AOV)
- Inventory turnover rate
- Return rate by SKU
Tools like DataDive, Sellerboard, or SmartScout can automate reporting so you can spot issues before they become costly.
8. Building a Real Team and Systems
Scaling solo becomes impossible past a certain point. Start hiring or outsourcing:
- Virtual assistants (VAs) for customer service and listing maintenance.
- Graphic designers for A+ content and infographics.
- Amazon PPC agency for ad optimization.
- Supply chain coordinators for logistics and restocking.
Document your processes in SOPs (Standard Operating Procedures). This ensures your business keeps running smoothly even if someone leaves.
9. Expanding into International Marketplaces
Once you dominate your home marketplace (for example, Amazon.com), expand globally.
Target Amazon Europe (UK, Germany, France), Amazon Japan, or Amazon Canada.
Use Amazon Global Selling to manage cross-border shipping, listings, and taxes from a single Seller Central dashboard.
Remember:
- VAT registration is required in Europe.
- Use Amazon’s Build International Listings (BIL) tool for quick translation and currency updates.
- Review import duties and customs clearance requirements before shipment.
Start with one region first. It’s better to master one new marketplace than to spread yourself too thin.
10. Protecting Your Brand and Avoiding Copycats
As your brand grows, so does competition. Protect your work early.
- Enroll in Amazon Transparency Program to prevent counterfeits.
- File for trademarks and design patents.
- Monitor your listings weekly for hijackers using Helium 10 Alerts or Brand Analytics Dashboard.
- Send polite but firm cease-and-desist letters when needed.
Your IP protection should be proactive, not reactive. Once a hijacker steals your listing, it takes weeks to fix.
11. Preparing for an Exit or Long-Term Ownership
If your brand generates consistent profit for 12+ months, you have two strong options:
Sell Your Amazon Business: Marketplaces like Empire Flippers, or Flippa buy FBA stores at 2.5x–4x annual profit.
Systemize for Passive Ownership: Build a management team and operate hands-off while keeping profits.
Common Questions New Amazon Sellers Ask
Even with a solid plan, a few big questions always seem to pop up right when you’re ready to get started. Let’s get into the nitty-gritty and answer the ones I hear most often.
What’s the Real Cost to Get Started on Amazon?
This is the million-dollar question, isn’t it? The honest-to-goodness answer is that it really hinges on your business model. But if you’re going the private label route, you have to think way beyond just the cost of inventory.
For a private label launch in 2025, you should realistically budget between $5,000 and $15,000. Trying to scrape by with less is a recipe for disaster.
Here’s a quick look at where that cash goes:
- Your First Inventory Order (500 units): This will be your single biggest check to write, usually landing somewhere between $2,500 – $5,000.
- Samples & Quality Inspection: Do not skip this. Ever. Set aside $200 – $400.
- Shipping & Freight: Moving your product from the factory to an Amazon warehouse will run you $500 – $1,500.
- Branding & Photography: Your product photos are your digital storefront. Invest $300 – $800 to make them look professional.
- Amazon Account & Software: Your Professional Seller account and essential tools like Helium 10 will cost about $100 – $150 a month.
- Launch Ad Budget: You need to fuel your launch with PPC ads. Earmark at least $1,000 for that first critical month.
Cutting corners to get below that $5,000 mark is a huge risk. You’ll end up compromising on product quality, marketing, or inventory levels, any of which can sink your business before you even get a chance to swim.
How Long Until I’m Actually Making a Profit?
You’ve got to play the long game here. The odds of being profitable in your first month are slim to none. Even the first quarter can be tough.
A realistic timeline to hit consistent profitability as a new private label seller is anywhere from 6 to 12 months. There are a few good reasons for this:
- Recouping Startup Costs: First, you have to make back everything you just spent to get the business off the ground.
- The Launch Grind: Your first 1-3 months are all about gaining momentum and ranking your product. You’ll be spending aggressively on ads, which eats into your margins.
- Reinvesting Everything: Any money you do make in the early days should go straight back into buying more inventory. The last thing you want is to stock out right when you’re starting to get traction.
Is Amazon Too Crowded for New Sellers in 2025?
I get this question a lot. Look, the marketplace is definitely more competitive than it was five years ago, no question about it. But “saturated” isn’t the right word. I’d call it “mature.”
The days of just tossing a random product on Amazon and making a fortune are long gone. But that doesn’t mean the opportunity is. It just means you have to be smarter.
Success on Amazon today isn’t about being the first. It’s about being different and better. I see new sellers crush it all the time by:
- Dominating a Niche: They don’t just sell a “yoga mat.” They sell a “sustainably-sourced cork yoga mat with alignment lines for hot yoga enthusiasts.” See the difference?
- Fixing a Common Problem: They read the 1 and 2-star reviews on their competitors’ listings and create a product that solves those exact complaints.
- Building a Genuine Brand: They focus on the entire experience, great packaging, top-notch customer support, and a story that connects with people.
How Do I Get My First Reviews?
Ah, the classic chicken-and-egg problem. Getting those first few reviews is a massive hurdle, and Amazon has become incredibly strict about how you do it. Forget all the old tricks. Offering discounts or freebies for reviews will get your account suspended fast.
Today, the safest and most effective way to get those crucial early reviews is through Amazon Vine.
It’s an official program where you give your product to a group of Amazon’s most trusted reviewers for free, and they leave honest, unbiased feedback. Yes, there’s a fee to enroll a product, but the high-quality, detailed reviews you get in return are pure gold for building social proof.